Showing posts with label Food Storage. Show all posts

Saturday, April 28, 2012

Home Made Oxygen Absorbers

     Well lets just say its good to be back! First off I'd like to post a couple of links this week which were awesome finds- first up, home made O2 absorbers.

     Oxygen absorbers basically suck out the O2 from the packaging which helps create a bacteria un-friendly environment and also prevents oxidization. This is pretty important to the average prepper, and excellent for those who want to make food storage last as long as possible.

     I haven't actually got a chance to make these yet, but they are high on my list of to-do's. One day I was curious to see if there were any way to make your own and I did a search and what do you know. Tightwadery wins again! HERE is the link where I found it. So 6 grams of iron filings ( link to a source is provided in the aforementioned thread) and 6 grams of sea salt is all it takes and viola! you are in business on the cheap. 

     Being someone who dehydrates I would love to have all the neat toys that Tammy does at Dehydrate2store.com but I couldn't see spending so much money on things that will eventually get used up like O2 absorbers. So here is a solution that I'm satisfied with. I can know that the absorber is fresh and new and no chance of accidental breaches that produce ineffective products or shortened lifespan. I can also regulate how much I use if I have a larger or smaller container as well.  I hope this is helpful for those like me with limited funds. 

     My plan is to use some white tissue paper cut in 1.5" squares, about 2-4 layers thick and scotch taped around the edges. We'll. see, I'll update when I have the chance to try it out.  

     Next post will be soon and its all about a free yes I said FREE book download site to old-timey ways of doing a lot of things that preppers will find fascinating, useful and informative. Till then!

-Jamie

Tuesday, August 23, 2011

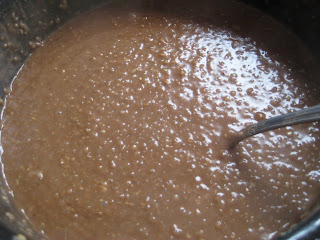
Home Made Coco Wheats

     Time for a recipe! One thing I've liked doing with my grain mill is to make our own Coco Wheats, so its time to share the goods with you. 
     Really this is so simple it doesn't even take measurements. Necessary items: Grain mill, wheat (sprouted and dried or regular) sieve, cocoa. I like to use sprouted and dried in my dehydrator. 
     Take whatever amount of wheat you desire (2 cups hard red winter wheat makes enough to make about 6 average size bowls of cereal) and grind on a smaller than cracked setting. On my Family Grain Mill this is a 2.5 setting. 
    

This is what it looks like up close before its sifted.


Sift a little bit at a time into a different bowl to separate out the bits that have already made it to a flour stage.


Add baking cocoa to the larger bits till you are satisfied with the coverage.
Cook as per directions given for the commercial product. If you don't have those handy, I usually do as much water as I want finished product and cut that amount in half for the coco wheats. Example 1 part cocoa wheats to 2 parts water. When it is cooked to the consistancy you want, add your sugar butter or whatnot. We usually like to add peanut butter, or maybe even some chocolate chips in the bowls, or some mint extract (just a touch). Vanilla is always good too.

If you don't use the whole batch that meal (dry mix) stick it in a container in the freezer to keep the oils from the fresh ground wheat from going rancid. Do this especially if you have sprouted and dried your wheat.  Enjoy!

--Jamie


Monday, July 25, 2011

Dry Bean Conversion and Chili Recipe

     Beans Beans the musical food storage staple! Ok Its been a while for recipes, and what better food storage staple to use than beans?  Beans have a long and glorious heritage, and so does one of our most common foods made from beans- chili. 
     The star of the south, beans can be used in multiple ways, from soups and stews, mashed and fried (or refried as it were) and even as flour! Click HERE for an excellent article on using beans and some little know ways to sneak them into foods without the family noticing.
     One of the things that always gets me though, is how many dry beans equals a can of beans, and vice versa when it comes to recipes. So I'll let you in on a little secret chart I keep written in my recipe book whenever I forget. Also remember that this is for the average bean sizes. There are of course the Limas and then the tiny little beans that you can find as well such as black beans or the smaller red beans. You would probably have to work out your own conversions with these oddball sizes. But for the average joe bean (no not coffee beans) this will work well:

1# dried beans = 2 cups (uncooked)
1# dried beans = 5.5 - 6.5 cups cooked
1 cup dried beans = 3 cups cooked
One 16oz can = 2 cups (with the liquid) or 1.5 cups drained
3 cups cooked beans = 6 servings
1/6-1/8 cup dried beans = 1 serving

     The chili recipe we use is (surprise!) from food.com and listed as a Wendy's copycat recipe. Even for those that haven't tried Wendy's chili (which anymore doesn't taste as good as it used to) this is just perfect. I have since tweaked the recipe as the one on food.com is a bit hotter than Wendy's usually makes it. But otherwise it is exactly the same (and I worked there for three years when I was younger, so I know). Here is my tweaked version:

1# hamburger fried and drained
1 can (15oz) tomato sauce
1 can kidney beans with liquid
1 can pinto beans with liquid
{Note: with our handy dandy conversion chart this equal s 1/2 cup each of kidney and pintos prepared in the usual manner}
1/2 c. chopped onions
2 cans rotel tomatoes (or you can used diced tomatoes and add in 1/2 c. diced green chillies)
1/4 c. diced celery
1-3 t. cumin 
1 T. chili powder (or to taste)
3/4 t. pepper
1 t. salt
1-1.5 c.  water

     Throw all together in a slow cooker or dutch oven for 3+ hours, stirring occasionally. If your from the west serve it with fry bread, if you're from the south serve it with corn bread, if you're from the north eat it with rice, if you're from the east, eat it on a hot dog.
     When I make the chili anymore I cut way back on the chili powder if I use the Rotel tomatoes (my son doesn't like a lot of spice), probably about 1 t. Those Rotels can be pretty spicy on their own. I also use more cumin (yay for cumin!) than most people so I use a whole tablespoon (hint 3t. = 1 T.). 
     This chili also cans up really nice as it is easy to double (or more) the recipe (just process for the same time as hamburger). This is also a good recipe to use with dried foods! I have on occasion thrown this together using nothing but the ground beef and the dried vegetables and water. Turns out just the same. Now with my canned hamburger I can have chili whenever I want. AWESOME!
Enjoy!

--Jamie

Wednesday, July 13, 2011

Summer Projects

     A couple days after Lilly was born I woke up at night to feed and change her. Upon my waking I had an urgent sense of "must be ready for the cold". Again a couple hours later, it happened again. Now usually I don't have foreboding type "premonitions" but this really hung heavy on my mind. This wasn't the kind of fun fall-itchy-knitting-fingers ready, or the kind of enthusiasm for the 101 projects I want to start at the first hint of cool breezes. It definitely had a heavy ominous feeling that didn't make me giddy or thrilled inside.
     Since then I've been really concerned about being ready for the cold. As it is a little vague, I'm not sure what areas I need to be ready in. I feel like getting a general swath of readiness in the clothing, food, and bedding areas of our lives.
     To start off with I decided that my zig-zag afghan needs to be getting finished. I also started a two tone blue granny square afghan for Nathans bed out of some acrylic (yeah I know- I cringed too!) that was given to me. The next afghan will be for the girls bed. I have even had inklings of some cardigan-type sweaters trying to force their way into my thoughts.
     In the sewing department, I'd like to have a new quilt for each bed. I plan on doing plain jane square or puff quilts, one for each bed as well. I've finished up the curtains for the living room and kitchen this week and am also going to start working on some for the kids' room and mine as well. I would also like to do some window quilts if I can squeeze the time out for them. It also goes without saying that that the kidlets will need warm p.j.'s and nightgowns (I'm due for some new ones too) and some heavier type clothes.
     The food department is pretty self explanatory- generally: 1.Get food. 2.Dry or can food 3.Try to find some place to put food.
     I've also been thinking about how this is all from an attempt at being ready for "something", when long ago this was the norm for everyone. Everyone had to store up for the cold seasons in this way. Its such a shame that we, as a "civilization" have had to re-learn the art of "survival" which was just normal everyday life for thousands of years, regardless of where a person lived or how rich or poor they were.
     So Ive been setting up goals through these last few weeks to get small things done in order to see larger long term results. I pray that it gets done, and in the proper capacity in which it is needed.
     What about you? Have you had any feelings of this kind? If so (or not) what are the projects you are working on now, for your benefit this fall/winter? Share with us!

--Jamie

Tuesday, May 3, 2011

Quicky Update

Just wanted to let you all know I'm still here. Last week found a powerful cleaning urge and I really did myself in the first three days. Wednesday was my birthday and also my home-visit for the midwife. For two days after that I sat and did hardly anything but sew, I figured I earned the time off. My husband has also been recovering from an accident in our van- swerving to miss an old couple walking on the road and he ended up hitting  a tree. Fortunately he wasn't severely hurt as the air bag deployed. However he has suffered from some kind of a hairline fracture and severe soreness to his right hip which required crutches and 5 days off from work. A week later the bruises on his legs are just coming out. Also have been getting some of the orders in - my herbs, the Berkey Light (WAHOO!) and the Watersorb crystals to make some cooling neck scarves for the heat this summer. So all in all its been a busy two weeks. That and keeping up with the news and the kids and trying to keep my sanity with expecting the baby in the next couple weeks ( never have made it to my due dates yet!) its been busy. Hope you all have been thinking about what you are doing about food storage and preparedness these last two weeks. So many things have been catching my eye at Drudge that I am amazed I am still sane and not going nuts with the preparing that I want to do.  OH HEY that reminds me I got to can up some chicken and some clarified butter from the videos that I posted for you. I'll put an update of those when I'm able too. Such an empowering experience for me and a pleasant sigh of relief for another bit of security for my family. Now I will be praying for some really good sales so I can stock up on meats to can. YAY!
Hope you have a good day and hopefully I'll get to post here soon!

Wednesday, April 20, 2011

Tax Return Planning

   Well we got our tax return in this Monday. After repaying a small loan my husband gave me $1000 to spend as I saw fit. So the question is, if you had $1000 what would you do with it?
   Right now one of the top things on my list is to get a Berkey water purifier. Having a source of water is most important. Really, what good would dehydrated food do you if you had no way to re-hydrate it? I have been eye-balling a BERKEY  LIGHT for a couple years now. In my opinion anything that can filter out red dye is definitely on the higher end. Now regularly I'd take the frugal route of making my own (see the HOMEMADE BERKEY FILTER link on my Pertinent Links page). In this case however I'm going to go ahead and buy it for the full price and get the "free" gift that is worth $70 on the site (a choice of a shower head, filtering water bottles or the PF2 filters). Since I'd been looking at it on Lehmans, I was glad to see an extra perk if I bought it through the company for the same price that Lehmans offers it for.
   Purchase #2 is going to be that pressure canner that I've been waiting for. With a couple dozen jars to start, I'm planning on putting a little extra money towards meat and butter to can up and store under the bed. Wish me luck!
   #3 is going to be about $150 worth of herbs from herbal advantage, including some capsules, emu oil and another tea ball.
   A possible for #4 is going to be some school cirriculum from Keepers of Faith, something that I can use to home school the children in the basics with quality materials.
   As for the rest, I'm hoping to set some aside for yard sales (hopefully some off season deals like a Kerosene heater) or some barrels for a rain collection system (our water rates went up another 4.4% yesterday).
   Whats on your "To Get" List? Let us know!

Tuesday, March 15, 2011

Home Made Cream Soups Recipe

Found this recipe at Day to Day Adventures and asked to include it here. A real meal and space saver for the prepared homemaker. Found it also at Food.com (formerly RecipeZaar.com) with several variations. I believe I will try looking for the Herb-Ox brand of bouillon cubes to use in mine as they are MSG free.

 
2 c. dry milk powder
3/4 c. cornstarch 
1/4 c. reduced sodium chx or beef bouillon granules
1/2 t. dried  thyme
1/2 t. dried basil
1/4 t. black or white pepper

Mix dry ingredients and store in an air tight container.
To prepare as a substitute to 1 can store-bought use 

1/3 c. of dry mix and 
1 1/4 c. water in a bowl or saucepan. Warm in the microwave (stirring every 30 seconds for 2 minutes) or heat on the stove.

1 recipe equals 9 cans of store-bought cream of soups.
Kim recommends using chicken broth for cream of chicken soup instead of the water. Other additions may include cooked celery and broth for the water substitute, chopped mushrooms and the water from the can as partial substitute for the water, chopped broccoli etc.

Thanks so much Kim! :-)

Sunday, March 13, 2011

Honey-Apple Pancakes (no milk, no eggs)

   I got this great recipe from the Wholesome Sugarfree Cooking cookbook. Excellent with or without syrup, I really liked this recipe as it uses no milk or eggs, but substitutes apple juice and  a bit of water and oil for the liquids. I was sort of skeptical that it would turn out well as it didn't have those ingredients, which I thought were critical to a good pancake recipe. My only changes to the recipe were a bit more honey- about a tablespoon more - because it came out of the jar faster than I could stop it and I used dried apple with  1/4c. more apple juice. I also used a bit more of cinnamon and a touch of nutmeg because I don't usually buy apple pie spice. 
Here it is as written in the cookbook from an apparently talented Ms. Laura Yoder of Free Union, VA.

1 1/4c. flour 
1/4 t. salt 
2 tsp. baking powder
1/8 t. apple pie spice
1/8 t. baking soda
1/4 t. cinnamon
1 1/2 T. water
1 1/2 T. oil
1t. baking powder
3/4 c apple juice
1 T. oil
1 apple finely chopped

   In medium bowl stir together flour, salt and 2 t.baking powder apple pie spice, soda and cinnamon. Mix water  1 1/2 T. oil and 1 t. baking powder together. In a small bowl, add the other wet ingredients and chopped apple; add all at once to flour, stirring until blended, but still slightly lumpy. Let batter rest 2-3 minutes. Fry in hot oil.

   I didn't really get the division of the oil, and I just combined all wet ingredients together and added them to the dry ingredients (including my dried apple) and stirred together. Having 3 tablespoons of honey was awesome, as I could smell the honey as they cooked -drooool. I would suggest trying a test pancake or two to get used to the way they cook, as they didn't bubble on top for me like regular pancakes do- only a bit around the edges where the batter was thinner. I made about 24, 1/2 dollar size pancakes for my kids and I   (about a tablespoon of batter each). Pretty neat and tasty recipe for my food storage. Hope you enjoy!

Friday, March 4, 2011

Bacon, Eggs, and Buttered Toast -Shelf Stable Breakfast


  Found an awesome article about canning bacon at BACKWOODS HOME  that I am definitely going to try at home! Another great way to take advantage of meat sales before the price of pork skyrockets in about a year. We are also planning on taking advantage of a friends piglet raising this year and are buying a hog to put up in various ways (great thinking on my husbands part!)
   And what goes better with bacon than fried eggs? Although powdered eggs are a life saver when it comes to food shortages, nothing beats a good fried egg. And although I can't find the source where I read it, at this time, Im pretty sure the powdered eggs are made with some type of aluminum to keep it free flowing. So here is a link to a page that shows you how the old timers used to store surplus eggs without refrigeration for up to a possible 2 YEARS. See all the information, test results and how-to's at NON-REFRIGERATED EGG STORAGE.
   Of course eggs and bacon wouldn't be complete without toast and butter. I'm sure you have the ingredients for the bread, so here is a great tutorial on how to can your own butter (ghee) from a sweet lady who was nice enough to share her methods.


Hope this adds some new dimensions to your pantry and your creativity- ENJOY!

Tuesday, February 15, 2011

Canning Meat


   I about had a coronary in the store today when I saw that the 5 pounds of  hamburger that at the begining of the year was about $8.99 a pound and had crept up to $10.45 by the end of January, was now $12.45. Thats a 2 dollar hike in less than 2 weeks! What really concerned me was the knowledge that this isn't some temporary quirk. These prices will look good compared to whats down the road.
   I've made the decision to upgrade to a pressure canner instead of my pressure cooker. I figure I'll see the returns for it just in canning meat alone. I'm still a die hard dehydrator, but meat is where the money is, and I don't have the freezer space to take advantage of sales. My husband also likes french cut beans, and says they taste "funny" when they are re-hydrated, so I will probably make a  habit of canning those too.
   My mom never taught me to can as she did SO MUCH when she was a girl she vowed she'd never do it again. So I'm very timid about teaching myself. My Gram spoke of accidents she had, like having the safety valve blow and her tomatoes spewing out all the way to the ceiling. I have only successfully canned a few beans several years ago, and some easy apple butter in a water bath a couple years in a row. Other than that my method of preservation is drying.
   Needing to get out of my comfort zone, I'm researching canning, particularly meat and came across a great video for chicken found here:


And another for ground beef here:


   Hopefully you will be able to use these to your advantage as well.

Thursday, February 10, 2011

Its Heeeerrrrrreeee!

Start snagging the deals while they are still here!

   
   Wasn't planning on posting till tomorrow, but I couldn't not put this up. NOW IS THE TIME TO PREPARE! And with a vengeance. This article doesn't even mention the fact of the falling value of the US Dollar, and it really just is going to mentally spur me into action.  Here is an article I found on Drudge this morning about the rising prices of food. 


also check this out

Food And Fuel Article

  They predict that the customer will feel it in particular in the meat department as soon as three months from now. Think it will blow over? Don't count on it...  pork prices will see a rise in around a year and beef in two. So prices will NOT be going down, and this is just in the meat department. The United Nations is forecasting food prices rising by an additional 40% this year.
  Take action now. And I'd say if you have a freezer or dehydrator, fire it up and get cracking!

Sunday, December 19, 2010

Honeyville Grain Give-Away WOW!


  Was up early and couldn't sleep. DH was trying to cook me out of the house again with the heater up to 75. (The man has no body fat!) Decided to check my email as I was out for the count yesterday with the flu (thank you raspberry tea!) and didn't get to the puter.
  What a great surprise when I see they are having an AMAZING freeze dried combo pack give away. It's so easy to register, just stop by  their blog and you have 5 different ways to enter and qualify. Winners will be picked Monday, so HURRY!
  I really love Honeyville grain, and was surprised to find out they have a blog here on blogger. Their products are excellent, and I plan on going through their posts to look at all their product reviews. At less than 5 bucks for shipping, there is no way you can go wrong ordering from them. I've comparison shopped, and found they beat out everyone in nearly every category! Hope you enter soon!